Home Mrs. Unger's Unbelievable Elementary Experiences! Meet The Teacher Classroom Tour Contact Me Image Map


Saturday, August 31, 2013

A Long Awaited FREEBIE!

Happy holiday weekend to you!  I hope you are enjoying the extended weekend, as I am.  :)  My sweet hubby is taking me down to Illinois tomorrow (for my upcoming birthday) to see my favorite band - Collective Soul!
 

I love me some Dean Roland!
 
Anyway, back on track.  Way back when (I am talking 2011), I wrote about how I use "Stretchy the Word Snake" in the classroom.  Click HERE if you want to go back and re-read that post.  I started off by creating cards for Short A, then
s - l - o - w - l - y
over time, I created cards for Short E, I, and O.  Then came along my switch from Kindergarten to ESL and I no longer had an immediate need to make the Short U cards.
 
However... since then, many teachers (maybe YOU) - even until this day - have asked, "Where are the Short U cards?"  Well, my friends, I finally got around to making them for you!  Yippee!  Soooo... if you are interested in grabbing this FREEBIE, please visit my TPT store and you will find them there!
 
 
We go back to school again (we technically started in July) on Tuesday, but things will be slightly different now because I have a student teacher joining me for the first time.  I am pretty excited about it!
 
Thanks for stopping by!  :)


Monday, August 19, 2013

Awesome Book for Pre-K - 2nd Grade Teachers and a FREEBIE!

Hello!  I just wanted to stop by quick in order to tell you about a new and AWESOME professional development book that I highly recommend you put on your To-Read List.  It is written by Cindy Middendorf and it is called Early Reading Instruction and Intervention: A Source Book for Pre-K - 2.
 
 
While I am still on summer break, my 14-month old son makes it challenging to read.  So...I have been plugging away, little by little each night after he goes to bed.  As always, Cindy has reignited my teaching fire!  Seriously - if you read any of her books, you will be so motivated to become the best primary teacher you can be!  AND...she always gives awesome examples and strategies that you can implement easily in your own classroom.


I have been a huge fan of Cindy Middendorf for a few years now.  If you want to read a previous blog post about Cindy and her other books, click HERE!  I was oh-so-excited the day that Cindy Middendorf wrote a comment on my little 'ole blog!  I asked her if she could sign my book and she kindly obliged.

 
Chapter 1 of this book is all about physical readiness being the prerequisite for intellectual success.  (Isn't awesome to have educational leaders out there back up, with brain-based research, what we primary teachers already know instinctively?  Thank goodness for them!)  Anyway, I got to thinking about ways I can easily incorporate important physical interventions that improve core strength, balance, etc.  Then, I thought about this DVD my son and I checked out at the library recently...the kids do exercises for each letter of the alphabet.  I like most of the exercises on the DVD, but some of them were kind of lame or redundent...like "B" for "bounce" and "J" for jump.  Eh.  So I decided to make up my own list.
 
 
Here is how I intend to use this list:
 
1 - Show large letter cards, starting with "A," once at a time.  Ask the students to identify the letter.
 
2 - State the corresponding exercise.  Then, model the proper way to do the exercise and encourage the students to do the same.
 
3 - Ask the students what letter comes next, then repeat!  Easy-peasy, lemon squeezey!
 
So anywho...if you are interested in doing Alphabet Exercises with your little ones in order to get the jitters out AND build core strength, please click HERE to visit my TPT store and grab it for FREE!
 
Alrighty, I am off for now!  I intend on working on my first author study unit.  We will see how that goes!  Enjoy your day and thanks for stopping by!  :)


Wednesday, August 14, 2013

Monday Made-It (Late, Of Course)

Good morning to you!  Is it wrong of me to look forward to my son's nap time, so I can blog?  Someone please amuse me and tell me I am not the only one!

Really quick before I get into my Monday Made Its - Check out my NEW and improved and totally awesome social icon buttons!!  I am super excited about them.  The one-and-only and totally amazing Erin at Creating and Designing updated them for me.  If any of you out there are interested in giving your blog a facelift, I would recommend Erin in a heartbeat!  She is great to work with (I e-mailed her about adding new social icon buttons and not only did she get to it in like a day or two, she took it upon herself to make them even cuter than before)!  Thanks, Erin!  I so appreciate it!

So that leads me to my next point...Bloglovin'...yes!  I am lovin' me some Bloglovin'.  I was at first hesitant to try something new, but I am so glad I did.  Bloglovin' makes it so much easier to follow and quickly read the blogs that you love the most.  So if you love my little blog, pretty please follow me!!  (My Bloglovin' button is to the right.)  Thanks!

Ah - one more thing... I (finally) created an account on Instagram.  I would love if you followed me on there!  (Just click on the Instagram button to the right.)  I only have one picture on there now, but there will be more.  I intend on using Instagram as a quick way to show what I am doing in my classroom, particularly when I do not have the time to write a long post about it.

Now on to the show!
 
So yeah - I am late on my Monday Made It... no shocker there.  I was just going to wait until next Monday, but then I read that Tara is not hosting her weekly linky party again until next summer (she will continue to host once a month though).  I am too impatient to wait until next month, so here we go!


I found this ADORABLE teacher gift on Pinterest last year and I knew I wanted to make it for a teacher friend one day.  Then come along these two new, sweet teachers at my school and I knew exactly how to welcome them!

 
Here are the items I included:
Band-Aids
glue stick
chapstick
tacks
Post-It notes
fun paper clips
Starburst candy
binder clips
small roll of tape
 
 
By the way, the FREE cutesie wootsie printable comes from Jena over at First Grade with Miss Snowden, so be sure to hop over there to snag your own copy.  Thank you for sharing, Jena!


This was a very small, simple project.  Originally I was thinking I was going to paint or iron my name on to my pink tote somehow, but... I am not all that creative and I did not trust my lack of artistic ability, so I went with a key chain instead, LOL.  I just created something on the computer, printed and cut it out, then wrapped it up with some clear tape.  Maybe one day I will grow the courage to put my name directly ON the tote...one day...maybe.
 
That is it for projects, for now!  I have the supplies for a "Homework Club" sign waiting for me in my loft, but I just have not gotten around to making it yet.  Soon...I hope.  In the meantime, be sure to hop over to Tara's linky party to check out other amazing projects that other awesome teachers have been working on!
 
 
Random Not-Teaching-Related Thought:
Three years ago today, I married the man of my dreams.  He is everything I ever hoped for in a husband...truly.  I love him SO much and I am very proud to call him my hubby, so I just had to throw that out there!
 
 
(This picture was taken on our wedding day.)
 
 
(And here Mr. Unger is again, being sillly!)
 
Thank you for stopping by!  :)


Sunday, August 11, 2013

Back to School Activities and Lots of Photos!

Happy summer to you!  I am going to start with a refresher on my current teaching position:  This is my second year of teaching ESL (4K through 5th grade) at a year-round school.  Our 2013-2014 school year began on July 10th, so I wanted to share a few activities that we did last month.
 
I happened to be in one of our 5K classrooms when I heard the homeroom teacher talking about lunchroom behavior.  A light bulb went off in my head, as I remembered that I have the perfect book for teaching little ones about proper lunchroom etiquette:
 
 
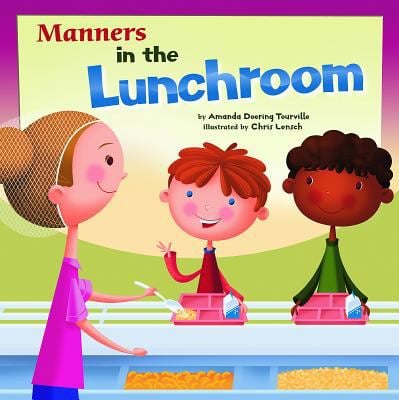
"Manners in the Lunchroom" by Amanda Doering Tourville.  There are a bunch of awesome books in this series ("Manners with a Library Book," "Manners on the School Bus," etc.), so be sure to check them out!
 
We read aloud and discussed the book, then we created these cutie patootie lunchboxes.  This craftivity idea originally came from Kindergarten...Kindergarten..., where Kathryn shares more books and activities that go well with this lesson.  She also provides us with a PDF version and a Word document (so you can edit the good and bad choices, so they align with the lunchroom rules of your cafeteria), so you can make them with your own students.  Thank you, Kathryn!
 
 
(This is not my photo...it belongs to Kathryn.  I need to get back into the habit of taking pictures!)
 
In order to informally assess what the students learned about lunchroom behavior, I broke out these Hands-Up Answer Boards from Smilemakers.
 
(I borrowed this image from Smilemakers.)
 
I read aloud some of the good and bad choices from our lunchbox craftivity.  If the students heard a good choice, they showed me the blue hand.  If the students heard a bad choice, they showed me the red hand.  Easy peezey, lemon squeezey and it worked well for an informal assessment!


THANK YOU to Smilemakers for generously donating these great boards!  The kiddos can also write on them with dry erase markers, so I know I will continually use these boards throughout the years to come.
 

I do have two suggestions for Smilemakers:
1 - If the boards were thicker, the kiddos would be able to use them anywhere.  Instead, we had to make sure we laid the boards on the floor, in order to have a hard surface to write on.
 
2 - The red on one side is perfect (kids think "No!" or "Stop!" when they see red).  I would suggest green - instead of blue - for the other side though (kids think "Yes!" or "Go!" when they see green).
 
 
So as you can see from the pictures above, I "push in" to whole group settings (4K, 5K, and 1st grade), but I also pull small groups (2nd through 5th grade).  With these small groups, we created this Pinterest-inspired "I am (a)..." writing activity
 
 
Just in case the pictures are not clear enough, I suppose I should explain what this is:  The kids created a huge letter "I" and wrote the words "am (a)..." on the side.  I decided to put (a) in parenthesis because some sentences did not need the word "a."  For example, "I am organized" does not need the word "a," where as "I am a student" does need the word "a."  I know...I am picky.
 
 
So then the students wrote adjectives and nouns that described themselves.  This actually took quite a bit of guidance, as the kiddos were having a hard time coming up with description words.  So I would come up with an idea, model how to write it, then they would compare that idea to themselves (Am I like that, too?  If not, is there a similar word that I could write?)  For example, when I wrote, "mommy," they would write "son" or "daughter" instead.

 
I really liked doing this because it allowed me to 1) get to know the kids, especially most of them were new to me and 2) see where they were at with their writing
 
 
Oh, and best of all, it was easy to implement.  As long as your have some markers, pencils, and loose leaf paper laying around, you are good to go!  Ah, yes...and I forgot to mention...the kids liked this activity!

 
Tip:  Play some music while the kids write!  I use Pandora a lot, specifically the Kidz Bop channel and the Disney Radio Stars channel.
 
 
We also utilized this FREE and AWESOME resource from Christina Bainbridge called "Getting to the CORE of our Classroom."  (She has a super cute blog called Bunting, Books, and Bainbridge that is totally worth checking out!)
 
 
Each student had a pencil, clipboard, and the recording sheet that Christina includes in her freebie.  They walked around my (very small) classroom and hunted for the apple cards.  Once they found a card, they wrote the secret letter that is found inside the apple.  (I especially loved this activity because the kids were able to get out of their chairs and move around!)
 
 
I attached the apple cards to the CORE or most important areas in our classroom:  1) the garbage can, 2) the seasonal word wall, 3) the traditional word wall, 4) the drawers with school supplies, 5) learning charts and posters, 6) the Kleenex box, and 7) hmmm...I cannot remember #7, haha!

 
After each student found all 7 core areas, we joined back at the table and discussed their findings.  Then, I asked them to look at the secret letters and read the secret message.  It was "WELCOME!"

 
My small groups also helped me with a project that turned out to be FAR more time-consuming than I had originally anticipated.  We tied plastic grocery store bags together and weaved this plastic "rope" through our fence outside in order to spell the words "ENROLL NOW!" (in English and Spanish).  (As mentioned earlier, we are a year-round school and parents often forget that we are an option that starts in July, so enrollment can be iffy until September.)

 
Two of my kiddos insisted I take a picture of them wearing our plastic "rope," haha!  I have no clue why, but it actually turned out to be a cute picture...if only you could see their adorable face!
 
Phew!  Two hours later and I am finally done writing this post.  (Does it take all of you that long when you write on your blogs!?)  It is 12:30pm here, so I supposed I should hop in the shower and get my day started, hehe.  Thanks for stopping by!
 

Monday, July 8, 2013

Linky Parties: Monday Made-It and Must-Have Monday!


Yay!  I am joining up with Tara over at "4th Grade Frolics" for her AMAZING Linky Party - Monday Made It.

I am super duper incredibly excited to show you my Monday Made Its!  I did not make anything totally unique or overly cool, BUT... I made them and I am proud!  I was feeling quite bummed looking at everyone else's Monday Made Its... wishing I was still in a homeroom (lots of things I see on Pinterest and teacher blogs are just not needed in my ESL room), so I had a reason to be crafty like so many of you awesome teachers out there.  But then this thought came to me:  "Amber, you should make some of these things NOW while you have some time, so when you go back into a homeroom, you will be ready!"  So I took that idea and ran with it!


A gumball machine that matches my (future) classroom decor.  I have a rug in my classroom currently that I L-O-V-E and I intend on using those colors in my next classroom.  I am a huge fan of pink and green together!  In my ESL room, I will put Gobstoppers and other hard, round candies in here as treats for the kiddos that come to my room.  After I go back to Kindergarten, however, this gumball machine will become a Literacy Center, like in my old classroom.  Click HERE if you want to read about that!

(By the way...unfortunately, this is NOT the same gumball machine that I used to have.  I had to go buy another one because the electricians broke mine on accident when they were replacing lights in my classroom.  I was SUPER upset!  Not at the electricians so much because accidents happen, but mostly upset because no one told me anyone was going to be working in my room.  I would have put things away, if I had known.  Grrrr.  So anyway, I bought this one for $12.00 at Big Lots.  It does the trick, but it is smaller than my old one.)


Anyway, my hubby insisted that I do this project "right," so first he took the gumball machine apart for me.  Then, we went to Menards and purchased some sand paper blocks.  I sanded off some of the original red paint to rough the gumball machine up a bit.  Next, I wiped the parts down with a damp cloth to remove the excess paint.

This was not on the original agenda, but I decided to cover the silver part of the gumball machine with painters tape that my hubby found for me in the garage.  I was worried that the spray paint might cause the knob and inside parts to malfunction.


Then, I went crazy with some "Watermelon" colored spray paint that I picked up from Michaels.  We put a few coats on, always letting the paint dry in between layers.  We also decided to seal the paint in by spraying clear enamel spray that we found at Menards.

Finally, after the layers were all dry, my hubby put the gumball machine back together and I tied a cute, green ribbon around it, like in the first picture above.  I am quite proud about how it turned out!

I recently found out that a special someone who is near and dear to my heart is pregnant!  Yippee!  She is quite anxious about this pregnancy, so I put together a little pregnancy survival kit basket to hopefully lift her spirits.  (Mommyhood can be a wonderful, yet scary thing for sure!)


(If I am able to find the time before I see her next, I intend on sticking a cute label on the front of the green basket.)

Here are the items I included in the basket (just in case you have a loved one who is also preggers and you want to put one of these guys together):

- Post-It notes (for when she becomes forgetful)
- saltine crackers (for sickness)
- mini cans of 7-Up (for sickness)
- prenatal vitamins (for a healthy baby and mommy)
- stretch mark cream (for avoiding stretch marks, of course; I used this every day and I did not get a single stretch mark...yippee!)
- Kleenex (for the emotions)
- Tums (for heartburn)
- sparking juice (for those times she is craving an adult beverage, at least she can pretend)
- pregnancy magazine (for mentally preparing herself)

Do you have any other good ideas of items I can throw in there??
Perhaps you have seen this on Pinterest or elsewhere...letters that spell out the word "NOISE" that teachers use as a tool to manage voice levels in the classroom.  When your students are too noisy, you simply take down the letter "E" and they know to quiet down without you even having to say a word.  If the volume continues to be loud, you take down the "S" and then the "I."  If the students get down to the "NO," then there is no talking allowed.

My supplies included wooden letters, magnets, Mod Podge, glitter, mini glue sticks, a sponge applicator, and the CUTEST hot glue gun I have ever seen in my life!  Everything was purchased from Michaels.  If you go there, do not forget to show your teacher ID for a discount!  :)


So I used the sponge applicator to smear on Mod Podge on the back of each letter.


Then, I sprinkled purple glitter on each letter.


I let these guys dry over night.


 The next day, my sweet hubby made me a contraption out of a cardboard box, so that I could spray paint in the yard without the wind interfering.  I sprayed the clear enamel on each letter, so the glitter could not rub off.


Oh my word!  I get so excited looking at my new pink and zebra-striped hot glue gun!  I found it at Michaels for $4.99, though I paid less than that with my teacher discount!!


So anyway... the last step was to hot glue the magnets to the back of each letter.


Ta-Da!  The finished product!


Okay, so I admit, I did not "make" this next item, but I "made" it special for me by tie a cute, purple zebra-striped ribbon on it.


I am totally excited about this pink Craftsman tool bag that I snagged from Sears!  I had no intention on buying anything there... we were just passing through the store to get to the rest of the mall.  But I found this for $12.99 and I just had to have it!


Just look at all those pockets!  Other than the adorable color, that was one of the biggest reasons I wanted this tool bag.  When I travel from class to class, I have to carry my supplies along with me, including scissors, crayons, clips, etc.  It gets annoying to have all those things thrown in a bag and then I have to dig for them.  I am sure this new tote will keep things more organized and easily accessable!


Oh how nicely dry erase markers and other writing utensils will fit in there!


The outside of the bag has mesh pockets on both ends, too.


Alright, now I am really on a roll!  I am also joining Sabra over at "Teaching with a Touch of Twang" for her linky party:  "Must Have Mondays."  It seems like other teachers blog about things that are on their wish lists.  But for me, each of these things were items I "needed" so bad that I bought them, LOL!


I am determined to tie cute ribbon on just about everything possible in my classroom.  I found these at Michaels in the clearance bin for a buck each!


I found this Dr. Seuss "Oh! The Places You'll Go!" tote in the 50% off bin at Barnes and Noble for $2.50.  I have always wanted to put together a graduation gift with this theme for someone, so I will hang on to this tote until the moment arrives.


After purchasing two CDs (for a birthday gift) at Barnes and Noble, I was able to pick out another CD for FREE!!  That price cannot get any better!  (Yep, I love musicals.)


Now this one I am beyond ecstatic about!  I have had a raincoat on my wish list for several years.  I found this adorable one at my favorite clothing store, Banana Republic.  It was originally a $175 coat, but I only paid $11.60 including the tax!  Woot woot!  Thank you to the person out there who purchased it online, then returned it to my local store, so I could pick it up on the clearance rack at a discounted price AND take advantage of their 40% off sale and utilize my rewards / coupons!  Ahhhhh!  So excited!

Milwaukee:  You have my permission to rain on Monday when I return to work.


I have been on the hunt for a cute pair of white sunglasses ever since I broke my last pair.  I picked these adorable shades up at Fossil... on sale for $34.99 - a little more than I wanted to pay, but I do love them!

Aaaaaaand now... the results of my very FIRST venture to Ikea!!


Here is my new teacher chair that I will put at our small group table.  It was $12.50, which I think is a pretty good price, but we did have to assemble it ourselves.


Of course, I had to weave some cute ribbon through the holes.


So here is the story with these pillows:  My husband had them in our condo when I first moved in... I hated them right from the start.  (By the way, my hubby has fabulous home decor taste, but these pillows were the exception... yuck.)  Anyway, when I finally convinced him to help me pick out new pillows, I threw the ugly ones in my classroom library, since I did not care if the kids destroyed them.


My students did not disappoint with the "destroying" part, did they?  ;)  Time for new pillow cases!


I am in LOVE!  The black and white swirly one was $6.00 and the solid pink one was only $3.00


Ha!  I just had to throw this picture in there.  My son could not help himself, once he saw new fluffy pillows on the ground.  What a cheese ball!  I love that boy!


Last, but certainly not least, my new stools that were only $5.99 each.  Cool beans!


I just love that the stools stack so easily.  That will be helpful when I have to pick up and pack up my room for cleaning.


That's it folks!  Now hop on over to Tara's awesome and inspirational blog to check out all of the other COOL Monday Made-Its!  Have fun and as always, thanks for stopping!  :)