Home Mrs. Unger's Unbelievable Elementary Experiences! Meet The Teacher Classroom Tour Contact Me Image Map


Tuesday, April 17, 2012

Share Chair "How-To" with Pictures and a FREEBIE!

Especially now that I am switching to Third Grade next school year, I am really LOVING the idea of a "Share Chair."  If you are unfamiliar with the idea... it is simply a special chair that students sit in when reading their writing pieces aloud to the class.  Here is an example of a "Share Chair" that I found online that I love:


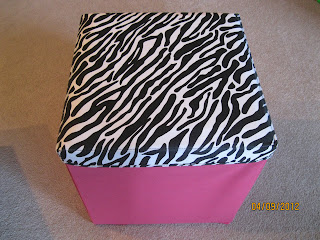
If you search "Share Chair" on Pinterest or Google, you will be able to find many more examples.  There are so many cute ones out there, but I wanted one that could be folded up and put away when not in use (since my new Third Grade classroom is MUCH smaller than my current Kinder classroom).  So I purchased this at Big Lots for... I think... $14, sounds about right.


Well, I am not much of an artist, so these are the steps that I took to ensure that I came up with something that was semi-fun and kid friendly.

1 - I found a font that I liked and typed the words "Share Chair" in a Word document.  I printed the words extra large and then taped the papers to the top of the chair.


2 - I traced the words with a thick permanent marker, ensuring that the ink bled through on to the chair.


3 - I used acrylic paints and thin paint brushes from JoAnn Fabrics (Don't forget to use your teacher discount there!) to paint the inside of the letter outlines.


I am super sad because when the purple paint dried, it looked totally black!  Boo hoo hoo!

4 - I traced the outline of the letters with puffy paint.


I had an oopsie on the letter "I"...darn it!  I am hoping it dries clear!

5 - I added some dots around the letters with the puffy paint.  I wish I had an artistic hand, so I could paint cool designs, but I decided to keep it simple with dots.


Here is the semi-finished product!  I still plan to tie some fun ribbon around the white bars to "spice" it up a bit more!  If you have any more EASY ideas on how I can make this "Share Chair" more fun for my kiddos, I would love to hear them!!


Okay, now on to your FREEBIE!  If you have been reading any of my recent posts, then you already know that I have recently been doing a lot of planning for next school year.  I am changing grade levels (Kinder to Third Grade) and I will be on maternity leave during the first month of school (July at my school).

Anyway, something I just finished is a "Classroom Rules Brainstorming Sheet."  I love the idea of my students brainstorming, developing, and writing their own classroom rules, but I know I will probably get blanks stares looking back at me if I do not scaffold this activity.  So to help my kiddos with their thinking, I created this brainstorming sheet.  The idea is not my own... I read about it in "The First Six Weeks of School" written by Paula Denton and Roxann Kriete.


Anyway, if you would like to grab this FREEBIE, please visit my Teachers Pay Teachers Store (where everything is always free) by clicking HERE!


Maybe it is just my pregnancy hormones flaring up, but I was a little crushed to see 909 pageviews on my blog, 230 views on TPT, and 120 downloads on my previous freebie and ZERO comments.  * tear*  So if you are able to use this freebie in your classroom, I could use a little love in the form of a comment.  <3

Thanks for stopping by!  :)


Sunday, April 15, 2012

Grab this classroom management FREEBIE!

As a Kindergarten teacher the last three years, I have had the luxury of having a boys and a girls bathroom right in my classroom.  I have been fortunate to be able to ignore the constant complaints during staff meetings that involve shared hallway bathrooms.

Well... that privilege will be coming to a quick hault for me soon.  Boo hoo hoo!!!  When I switch to Third Grade next year (July 2012 for our school), I will have to figure out a completely new bathroom procedure.

I listened enough to the complaints at staff meetings to know that one problem with intermediate students is HOW OFTEN they are in the hallway because they are supposedly in need of the bathroom.  I would like to nip that problem in the bud before it even starts in my classroom!  I saw the perfect inspiration on Pinterest:


I am not sure where the idea originally came from because, when I click on the picture, it does not lead to a blog or anything.  :(  So if this idea is yours, please let me know and I will - of course - give you the credit you deserve!

Anyway, I wanted to "cute" it up, so I created my own "Emergency Bathroom Trips" poster.  I plan to...

1 - Print this little creation (including the numbers, not pictured here) on our color printer at school and on cardstock.

2 - Cut out and laminate the cardstock.

3 - Arrange and attach the printables on a thick, cute strip of ribbon (running vertically), so that the poster is on top, then the "1," the "2," the "3," and finally the "4" at the bottom.


The AMAZING and FREE border came from "The 3am Teacher Graphics".  I am in LOVE with this newly found blog! 


Photobucket
 
 
Anywho... if you would like your own copy of my FREEBIE, be sure to visit my Teachers Pay Teachers Store (where everything is always free) by clicking HERE!
 
Thank you for stopping by!  :)  If you are able to use this freebie in your own classroom, I would love to hear about it!


Monday, April 9, 2012

She shopped, she scored! Plus a FREEBIE for you!

Oh... my... goodness, blogging friends!  I cannot tell you how excited I am right now!  Here is why:

I have been wanting to make those crate seats for a long time now.  (You know what I am talking about, right?  Seems like every teacher has them, except me.)  Here is an example:


I asked my dad if he would help me make these (he is super handy) and he was willing to help.  However, he was nervous about what would happen if a student fell through and was injured on a "teacher-made" seat.  (Unlikely, but you cannot blame a daddy for worrying about the well-being of his little girl, hehe.)  So I became somewhat discouraged about making these cute creations.

Then... I saw another interesting picture on Pinterest that came from Pam's blog, My Second Home. 


Pam said she found these ADORABLE storage seats at Big Lots, so I have been meaning to stop by that store forever now.  Well... I was driving passed a Big Lots today and thought to myself, "Fat chance that I will actually find those storage seats, but the hubby is at work and I have some free time.  Eh, why not give it a shot?"  (If you are a Big Lots shopper, you know how AWESOME that store is, but you also know how random their shipments are.)  But wouldn't you know it, I found them!!!


Don't you just LOVE the colors and designs!?  They were $15 each, but like Pam mentioned on her blog, I would much rather spend $15 than spend the time and energy making these things.  (I wish I was creative like many of you awesome bloggers / teachers, but I just do not have it in me!)  I would have liked to get more than two, but this was all they had in the store today.  I will keep checking back.


I also scored some other things for my classroom.  I am switching to Third Grade next year, so I am all about this "Share Chair" idea that I see all the time on Pinterest (a special chair students sit in when they are sharing writing pieces with the class).  I found this bright and cheery beach chair at Big Lots that I will eventually decorate to become our "Share Chair."


I am hoping my friend will help me paint it to make it look cute.  (Did I mention I am not creative?)  Best of all - these things all fold up, which is wonderful because my new classroom is WAAAAAAY smaller than my current classroom (boo hoo hoo).


I am a huge fan of tableclothes.  I love how I can throw a tablecloth over a table and it really brings life to that area... so easy, so inexpensive!  I found this cute tablecloth today at Big Lots for a few bucks.  I am going to put it on the main table in our classroom in the "Central Station" area.


Okay, now on to other matters...

Did you see Marlana's FREE "Chocolate Bunny Activity" on her blog, Lil Country Kindergarten?  Head over to her blog to grab it!  I used this activity with my kiddos and they LOVED it!  (Duh... they got to eat chocolate.)


Here are some pictures of what we did in our classroom, using Marlana's activity:


We labeled the parts of a chocolate bunny.  I did this on chart paper and my Kinders did the same on their own copies.


I then gave each student a chocolate bunny (I found 3-packs at the Dollar Tree).  I instructed them to take ONE bite out of their bunny.  Then, they decorated their own bunnies and cut off a piece of the bunny to show where they took a bite.  Finally, we graphed the results.  As you can see, our data was completely lopsided!  Next time, I will encourage the kids to take a bite out of ANY part of the bunny.  (And, in case you are wondering... yes, I let my students finish eating their bunnies, hehe.)

Well... if you have read this whole post, you definitely deserve a FREEBIE!  I created some organizational sheets for my teacher planning binder that look like this:


If you would like to grab your own copy of these pages, visit my Teachers Pay Teachers store (where everything is always free) by clicking HERE!  If you would like to add more pages to your own collection, contact me and I will happily send you the Word version.

Phew!  That turned out to be a LONG post.  Thanks for sticking around and, as always, thank you for stopping by!  :)


Friday, April 6, 2012

A FREEBIE For You - Table Group Name Signs

So in my Kindergarten classroom, each table of students chooses a new group name every 3 weeks (which is how often our Reading themes change).  I create more than enough signs, so each table has a choice.


I really like using table names because they help with transitions.

The table signs pictured above would be fine for my new 3rd grade classroom (I will switch to 3rd grade, starting in July), but all the other themes I used in Kindergarten are too primary for 3rd grade.  Soooooo... it is time to create new ones!

Michelle over at "The 3am Teacher" has shared some AWESOME border frames for free... along with a ton of other cool freebies!  I used them to create new signs.  Here is one example:


If you would like to view and download the other table group name signs I created, please visit my TPT Store to grab them for FREE by clicking HERE!

I hope you can use this freebie in your classroom.  Thanks for stopping by!  :)


Thursday, March 29, 2012

Lunchbox Linky Party and a Giveaway!

Oh what fun!  Tara over at 4th Grade Frolics is hosting a totally unique Linky Party:  "Looky in My Lunchbox Linky."


Photobucket


I am a girl who loves to eat and talk about food, so I had to join!  Tara is also giving away this CUTE lunchbox from Thirty-One, so be sure to join the fun!


So here is a picture of my lunchbox.  Other teachers have asked me if it is a Thirty-One bag....nope!  I found this at Target - though my teacher bag is from Thirty-One.


Here is what I had for lunch today!


I am nearly 8 months pregnant, so I am TRYING to eat healthy - though I often fail.  I have been ordering adult lunches from our school cafeteria because they are cheap, healthy, and pretty darn tasty!!  Today I had a chicken salad sandwich on a croissant.  I also packed myself an avocado, an orange, fresh strawberries, cranberry juice, a cookie, and pudding.  Not going to lie... my lunch did not stop there.  I had more in my lunchbox, but I was too embarrassed to take it all out at once in front of my co-workers, haha!  They already thought I was a weirdo for taking a picture of my lunch!!

So Tara asked a few questions in her Linky Party.  Here are my answers:

No, we do not eat lunch with our students - THANK GOODNESS!  I love my kiddos, but geez... we all need a break!

Our lunch / recess break is from 11:00am - 11:50am (primary grades, K - 2nd).  We are fortunate to enjoy that entire 50 minutes, unless we have to "serve" our weekly lunchroom duty for the first 15 minutes OR if we have to "serve" a recess duty (a few times a year).  Oh yeah and on inclement weather days, we have to keep our kids.

I used to eat by myself in my classroom, so I could get work done... but somewhere down the line - probably by the start of my third year of teaching - I realized it is important for me to take a "brain break," take a few deep breaths, talk with my colleagues in the teachers' lounge, and actually EAT!

Well, that was fun!  Thanks, Tara, for hosting such a cook Linky Party!  And thanks to YOU for stopping by!  :)


Wednesday, March 28, 2012

Integrating Art into Other Content Areas

One of the many things I love about Kindergarten is being able to use art projects to teach concepts and lessons.  (Someone please reassure me that this is also appropriate for Third Grade!  I will be so sad next year if I am frowned at if and when I do art projects in my new classroom!) 

Every Wednesday, my students particpate in what we refer to as a Classroom Meeting.  This is basically my approach to Bully Prevention, Conflict Resolution, Community Building...whatever you want to call it.  Here is what we did today:

1 - I opened up the lesson by asking the students a couple of questions:  "What is a leader?  What are some qualities of a good leader?"

2 - I read aloud Swimmy by Leo Lionni.


3 - We had a discussion about Swimmy and what made him a good leader.  We brainstormed ways we could be more like Swimmy.  We talked about how the fish worked together as a team to reach a common goal.

4 - The students worked together to splatter paint a large sheet of white butcher paper with blue paint in order to create "water."  (However, it was difficult to see the fish on the white paper, so I might suggest using blue butcher paper and then using white paint to splatter.)  I recommend laying down extra butcher paper underneath your art work to catch any fly-away splatters.  Or if you are lucky enough to be in a warm climate, paint outside!

5 - The students used an art technique called "crayon resist" to create their own unique and special fish.  First, they colored a design on their fish using crayons.  Then, they used water color paints to paint their fish.

6 - I was planning on having the kids work together to put their little fish together to make a big fish (just like the fish in the story), but this lesson and project ended up taking up a ton of time as it was, so I just did this last step by myself after school.


We had fun with this lesson.  Give it a try in your own classroom!  If you do, I would love to hear how it goes.  Have fun and thanks for stopping by!  :)


Tuesday, March 20, 2012

Stretchy the Word Snake - Part 3 (FREEBIE!)

If you have been using "Stretchy the Word Snake" in your classroom, you will be happy to learn that I just created some cards for short vowel "E"... yay!  You can pick up your own free copy of the Short "E" cards at my Teachers Pay Teachers store by clicking HERE!


If you are unfamiliar with "Stretchy the Word Snake," but would like to introduce him to your students, read my previous posts HERE and HERE!

Thanks for stopping by!  :)


Sunday, March 18, 2012

Anchor Charts Linky Party and a FREEBIE!

I am joining the awesome intermediate crowd over at Ladybug's Teacher Files - which, by the way, is my new favorite blog HANDS DOWN!  If you have not yet explored Kristen's blog, take some time to do it.  Here is my warning to you though:  You will not be able to stop stalking her!  When I first discovered her blog recently, I spent an entire morning and afternoon exploring what she had to share...AHHHH-MAZING!


I will be honest:  I do not have any photos of anchor charts to share.  I am not even teaching Third Grade until July.  So why am I joining the Linky Party, you ask?  Well, I do have something to share that is related to anchor charts and I think you all will like it!  I created a binder cover (as well as a side panel label) for an Anchor Chart Binder.


"Are you stuck?  Well, you're in luck!  Anchor Charts can be used when you're confused."

You can snag this FREEBIE at my Teachers Pay Teachers store by clicking HERE!

If you are unfamiliar with Anchor Chart Binders, here is the basic concept:  When your classroom becomes overcrowded with anchor charts, you take a picture of them, put them away for next year (or give them to your students to take home), then you print the photos and organize them in a binder that your students can refer back to when they need help with a particular concept.

Side note:  Nancy, over at Teaching My Friends, has shared an awesome post about why and how she utilizes an Anchor Chart Binder in her classroom.  Head over to her blog to read all about it!  Be sure to pick up a copy of the FREEBIE that she shares:  an index page for your Anchor Chart Binder!!  She also includes some helpful photos, like the one below, that help you understand what an Anchor Chart Binder can look like.  Thanks, Nancy!!


Oh, by the way, if you are a primary teacher, there is another Anchor Chart Linky Party for you going on over at Ms. M's Blog.  Head over there to join the fun!


Hmmmm, I guess that is it for now.  Thanks for stopping by!  :)