Home Mrs. Unger's Unbelievable Elementary Experiences! Meet The Teacher Classroom Tour Contact Me Image Map


Saturday, December 31, 2011

My First Blogger Award! Yippee!!


I woke up this morning to find a message from Lisa over at Criss-Cross Applesauce that she awarded me The Versatile Blogger Award!  Yay!  Thanks Lisa!!  My first blogger award...I am so flattered.  Thank you for re-lighting my fire and desire to blog and share all things teaching!

Criss-Cross Applesauce

I so appreciate this recognition, so I want to be sure to follow the blogger award rules:

1 - Thank the person who kindly nominated you by linking back to their blog.  Thank you again Lisa!

2 - Say seven things about yourself - see below, if you're interested.

3 - Pass this award on to 15 newly discovered blogs and let them know they have received an award.

Seven semi-interesting things about myself:

1 - I am pregnant for the first time - 5 months right now!  I cannot tell you how excited we are all around here.  This baby (which is due at the end of May) will be the first grandchild on both sides of the family.

2 - I love to eat!  My favorite foods are guacamole, prime rib, and sushi (which I cannot eat right now, due to the pregnancy...boo).

3 - I am currently reading The Best of Me by Nicholas Sparks - my favorite author.

4 - I am slightly obsessed with Cindy Middendorf and her Kinder-friendly approaches to teaching and learning.  Her awesome books are like my teaching bibles, which I have read and re-read.  I have been fortunate enough to see her present 3 times in the last year.  I regulary implement her ideas and strategies in my own classroom.

5 - My favorite band is Collective Soul.  On our wedding day, I walked down the aisle to the all-instrumental song "Pretty Donna" (played by a string quartet).  This song was written by the lead singer of Collective Soul.

6 - I am the mommy of two fat black cats, Sushi and Roscoe.  They were a birthday present from my husband a couple of years ago.  I love them!  I feel so lucky to have found such great kittens at the Human Society.

7 - I love living in the Milwaukee area - the smallest big city in the world!  Okay, the cold and snow in the winter stinks...but everything else makes it worthwhile!

6 blogs that I have recently found that I just love:


Okay, I'm going to cheat just a little.  For the remaining 9 blogs, I am going to list some of my old favorites.


Happy last day of 2011!  Cheers to the New Year!  Thanks for stopping by.  :)


Wednesday, December 28, 2011

Updated (Again): 100th Day of School Stations and a FREEBIE!

Ask and you shall receive!
Okay, admittedly that was a bit dramatic.  But seriously... I have something awesome for you! 

So since I wrote this post back in 2011 (or maybe that's when I updated the post), I have had many of you wonderful teachers ask about my station signs.  Well, I always responded with, "I don't know where I saved that document," which was the truth (I think it was on a flashdrive that ended up getting crumbled to pieces - long story).  The other part I didn't say was, "I'm too embarrassed to share such a simple, ugly document."

It was always my intent to re-create my signs and make them look cuter, but my trouble was finding the time.  Well, the time has come...


My EDITABLE 100th Day of School station signs are now available!  Check them out at my TPT store!

~ ~ ~ ~ ~ ~ ~ ~ ~ ~ ~ ~ ~ ~ ~ ~ ~ ~ ~ ~ ~ ~ ~ ~ ~ ~ ~ ~ ~ ~ ~ ~ ~ ~ ~ ~ ~ ~ ~ ~ ~ ~ ~ ~ ~ ~ ~ ~ ~ ~ ~ ~ ~ ~ ~ ~ ~ ~ ~ ~ ~ ~ ~ ~ ~

I am joining the linky party over at TBA - Teaching Blog Addict:  "100th Day Ideas."  Be sure to hop over there for more great ideas from amazing teachers!

I love the 100th Day of School!  I am all about a fun-filled day when I can throw my regular lesson plans out the window and plan a day of engaging activities that feels more like a "party" than "school."  (Though we wise teachers know this "party" is certainly a learning experience they will never forget!)

I turn the 100th Day of School celebration into a parent involvement day.  If you would like a copy of our bilingual (Spanish and English) parent invitation, visit my Teachers Pay Teachers Store for this FREEBIE!  (I left the download as a Word document.  The formatting won't come out correctly on your end if you do not have the same font, but at least you will be able to revise the document, so you can use it.)

The majority of our morning is spent in 7 stations.  I divide my students into small groups ahead of time and I post these groups on the SmartBoard for all to read.  I always make sure I assign at least one student to each group who has a parent volunteer joining them.  The students spend 15 to 20 minutes in each station before they rotate to the next station.

Tip!  In order to keep parents "in the loop," I post the schedule or agenda on the whiteboard.  (This also encourages the parents to scoot out the door at the appropriate time.) 

Tip!  Play music when the students are working.  When you shut off the music, the students will know when it is time to start cleaning up their station.

Tip!  Use tape to mark arrows on the floor in order to visually show the students the directions in which they should rotate stations.  I have some bright green tape from JoAnn Fabrics that I will use this year.

Tip! Post "I Can" signs at each station (English and Spanish, if necessary), so the parents understand what it is the children are supposed to be doing at each station.  If you don't have time to create your own, be sure to check out the ones that I use!  They are editable and available in my Teachers Pay Teachers store.


Anyway, here are our 7 stations:

Station #1 - "100 Days Smarter Crown," Part 1:
This activity takes the students the longest to complete, so they work on their crowns in two stations.  This idea comes from the wonderful Shari Sloane.  If you are not already familiar with her, I highly recommend that you visit her website:  Kids Count 1234.  In order to find her particular post about these crowns, click on "Math Activities."

So you (or your educational assistant, if you're lucky enough to have one, or a parent volunteer) will need to prep these crowns ahead of time.  You need to staple ten 1.5 inch x 12 inch strips to the back of a sentence strip.  Hole punch each strip at the top.  You then stick or glue a label on the sentence strip that says "100 Days Smarter!" These are also available in my pack.  (Something I do differently than Shari:  I use multi-colored strips, not just white.)


When the students come to this station, they stick (or glue) 10 of something to each strip.  This is what my students do:
- Stick 10 dot stickers.
- Stick 10 letter stickers.
- Stick 10 picture stickers.
- Stick 10 foam stickers.
- Stamp 10 fun stamps.

Station #2 - "100 Days Smarter Crown," Part 2:
The students finish their crowns at this station.
- Glue 10 little circles (from hole punchers).
- Glue 10 sequins.
- Glue 10 elbow noodles.
- Glue 10 small buttons.
- Punch out 10 holes with hole puncher. This year I have letter hole punchers! I also found some picture hole punchers at The Dollar Tree.


When the crowns are dry, help your students gather the tops of each strip so that the holes overlap.  Insert a brass fastener in the hole.  Don't forget to take a picture of the students wearing their crowns!  (We usually wait until the afternoon when they are completely dry.)

I was super disappointed when I took my "100 Days Smarter Crown" out of storage today.  It flattened!  :(  But you get the idea.


Station #3 - "100 Gumballs"
Each student takes a paper that has a picture of a gumball jar and 100 gumballs inside.  Students find the numbers in chronological order from 1 - 100.  They mark each "gumball" with a Bingo marker / paint dabber after they find and say the number.  The students then pick up the paper without numbers and they write the numbers from 1 - 100.  These printables (both with and without numbers) are also available in my pack.

Tip! I enlarge this image using our photocopy machine, so it is twice the normal size.

Tip!  Provide the students with scrap paper to slide under their gumball papers.  The Bingo dabbers have a tendency to leak through the gumball papers...at least when little hands are dabbing too much or too hard.


Station #4 - "Count to 100"
If you read through my parent invitation, you noticed that I ask the students to bring 100 of the same object (nothing edible).  The objects must be small enough to fit inside a paper lunch bag, which I provide.  Students bring things like paperclips, pennies, small Legos, small plastic toys, etc.  The students take a laminated hundreds chart and practice counting to 100 as they place one object on each number.  (I have included a cuter 100s chart than the once you see below in my pack, in case you don't have any readily available in your classroom already.)


Tip!  Print the 100s chart on colorful cardstock and laminate them so you can use them year after year.

Station #5 - "100 Piece Puzzle"
This activity is a group effort.  In other words, when the students transition to the next station, they do NOT clean up.  They leave the puzzle as is.  A 100 piece puzzle has proven challenging for my young ones, but with the help of the parent volunteers, they get it done...and boy, are they proud of themselves when it is complete!  If you do not already have a 100 piece puzzle in your classroom, visit your local Dollar Tree or Dollar General.  They usually are stocked with them.


Tip!  Provide the students with a solid work surface.  If this station is on the ground, like in my classroom (on the carpet), lay down a tarp or something of the sort, so it can be moved.  That way, the students can finish at a later time, if needed.

Station #6 - "Towers 100"
This station is simple to prepare and simple to do, but my kids LOVE it!  They just count and stack 100 objects...or that is the goal, anyway.  Here are some suggestions of objects that are good for stacking:  applesauce or fruit cups, Legos, connecting cubes, pennies, poker chips, and two-sided round, flat math manips (if you have them in your classroom).


Station #7 - "100 Loops Necklace"
This station is not assigned to anyone.  Instead, students go to this station, if they finish their assigned station early.  Your early finishers might visit this extra station several times, in which case they may actually finish their necklaces.  Anyway, they just loop Fruit Loops cereal on to a string of yarn, while counting of course.

(I do not have a picture to show you, but thanks to Mrs. Lee, here is a photo for you visual learners out there.  If you would like to read more about how Mrs. Lee celebrates the 100th Day of School, click HERE!)


Tip!  Wrap a small piece of masking or painters tape around one end of the yarn.  This harder, pointier tip makes it easier for the kids to get the cereal on there.

Tip!  If you have the students count 10 orange, 10 red, 10 blue, etc. it will be easier for them to stay on track with their counting.

So that's it!  If I am leaving out any logistical details that you would like to know more about or if you have any questions, please be sure to leave a comment and I will get back to you as soon as possible.

I am planning on writing a second post about the 100th Day of School on another day (my brain is fried at this point and  I have dirty dishes waiting to be washed...boo).  My next post will detail what we do in the afternoon on this special day.  So check back later!

Thanks for stopping by.  :)

Friday, December 23, 2011

FRIDAY FREEBIE!

I realize it is too late to use this FREEBIE with your students this year.  However, you may have little ones running around at home this holiday season.  Give them something fun to do!  This writing activity can help.  (If nothing else, be sure to save this printable on your flashdrive for next year!)

Visit my TPT Store to get your FREEBIE!  It is a writing activity for emergent and young writers.  The students use their fives senses to describe Christmas.  (If you want the Word document so you can make changes, just let me know.  But I cannot promise the formatting and fonts will come out the same on your computer.)

If you would like to join TBA's Friday Freebie Linky Party, be sure to hop over there and link up!


Freebie Fridays

Merry Christmas!

Thanks for stopping by.  :)

Thursday, December 22, 2011

Storytime From A to Z - Lots of Ideas!

I don't know about you, but I get BORED with many of the books that are included in our Reading series.  Don't get me wrong, some of them are good.  But sometimes, I think, "Really!?  Who thought this was a good choice for Kindergarten??"

In order to enhance our Reading experiences, we read other books...and LOTS of them!  I like to refer to this teaching resource:


I found this gem at a local teacher store, but no doubt you can find it online.  It was created by The Mailbox (I heart The Mailbox).  <3

Here is why I like this book:

1 - There is a book idea for every letter of the alphabet.  So if I want an extra read aloud, I think about what letter we are learning, I find it in "Storytime From A to Z," and "BAM!"  I have my lesson!

2 - For every story, there are also many interactive and student-centered ideas.  Yeah, yeah...there are worksheets.  But there is other fun stuff, too!  Activities where you think to yourself, "Am I really wasting using 5 minutes of my valuable Reading block to do this activity??"  And then that wonderful teacher inside of you answers back, "Yes, because these are the activities that my students will remember years from now."  :)

3 - Can we say MULTIPLE INTELLIGENCES!?  This book is great about including activity ideas that reach all learners in an appropriate manner for five and six-year olds. 

4 - If an activity describe in the book requires a printable or some sort, it is included in the book.  Yay!  Less work for you!

5 - The books are all FUN!

To give you a better idea of what you would be getting if you purchased this book (haha, I sound like a sales representative for The Mailbox), you can read what my Kinders will be up to in January.  We will be learning the letter "Bb."

1 - "Roll Call Banter" (Using Prior Knowledge):  Display a barn and animals (some that belong to a farm and others that do not).  I use a farm-themed felt board set that I have along with some other felt animals for this activity.  Maybe you have some plastic toys?  Photo cards?  The students work together to sort the animals.  Those that belong on a farm go in the barn.  Those that do not belong on a farm, go elsewhere.  For fun, have the students say the animal names as they are placed in the barn!

2 - Read aloud Barnyard Banter by Denise Fleming.


3 - "Barnyard Buzz" (Recalling Story Events and Characters):  Instruct the students to stand in a circle and select one volunteer to stand in the middle as the "cow."  Lead the group in singing the first verse of the song (sung to the tune of "The Farmer in the Dell"):


The cow is in the pasture.  The cow is in the pasture.
Moo, moo, moo, moo, moo.
The cow is in the pasture.

Tip!  I like to give my volunteers animal puppets or masks while they are in the middle of the circle.  :)

Ask the students to recall which animal appeared next (after the cow) in the story.  Whichever students correctly names that animal gets to be the next "animal" in the middle of the circle.  Lead the students in singing the next verse:

The (cow) sees the (rooster).  The (cow) sees the (rooster).
(Cock-a-doodle-doodle-doo).
The (cow) sees the (rooster).

The song and activity continues until all of the characters have been recalled and named!

4 - "Bell Ringer" (Recognizing the /b/ Sound):  Give each student a cow bell (or the students can take turns, if you do not have enough for each student).  I purchased mine at a local store called Merchadise Outlet.


Randomly show objects (or photo cards).  If the word starts with the /b/ sound, the students ring their bells.  If the word does not start with the /b/ sound, the students pass their bells to the next person in line or in the circle.

5 - "Barnyard Buddies" (Writing):  Give each student a sheet of construction paper as well as a barn pattern (included in "Storytime from A to Z" and pictured below).  Tell the students to cut out the barn pattern and glue only the top part of the barn to the construction paper.


Students glue a farm animal under their barn pattern.  The book suggests that the students cut out photos from magazines.  I don't know about you, but I do not have magazines with farm animals in them.  So I just print out pictures of farm animals online.

Students write sentences that give clues about their animals. I like to have the students end their writing with the question, "Who am I?" because we are also starting to learn about writing questions this week. :)

You might choose to bind the pages into a classroom book called "Barnyard Buddies."  Or you might choose to display them, like we did.


"Storytime A to Z" also includes an activity sheet called "Barnyard B's" in which students color and cut out pictures and then glue the pictures that start with the /b/ sound in the barn.  I almost never have time for this in class, so it ends up going in their weekly homework packets.

Do you have any fun ideas that we can add to this lesson?  I would love to hear your ideas, so be sure to leave a comment.  Thanks for stopping by!  :)


Wednesday, December 21, 2011

New Blog Alert - Picture Perfect Kinders!

Alright, maybe I'm a bit biased because Melissa is a friend of mine.  :)  But seriously, she has a great thing going on over at Picture Perfect KindersIf you like creative, fun, and student-centered ideas...this is the place for you.  If you are a visual learner like me, you will LOVE all of the pictures she posts.

No doubt you will sense this teacher's genuine passion for teaching after you read a post or two.  Melissa puts so much effort into what she does in the classroom...how lucky are the students in her classroom!?

Okay, why are you still reading this post!?  ;)  Head on over to Picture Perfect Kinders, have fun, and be sure to become her newest follower!  Thanks for stopping by.


Friday, December 16, 2011

Poetry Binders (and a FREEBIE)

So I don't know about YOU, but I looooove Poetry Binders!  Do you use them in your classroom?  If you do, be sure to leave a comment if you have tips or ideas to share!

My goal is to introduce a new poem once a week, appropriately called The Poem of the Week.  We usually fulfill that once a week goal...but you know how things go.  I select poems that correspond with our current Reading theme or I choose a poem that is stuffed with our high-frequency word of the week.  On occasion, I will throw a fun seasonal or holiday poem in there.

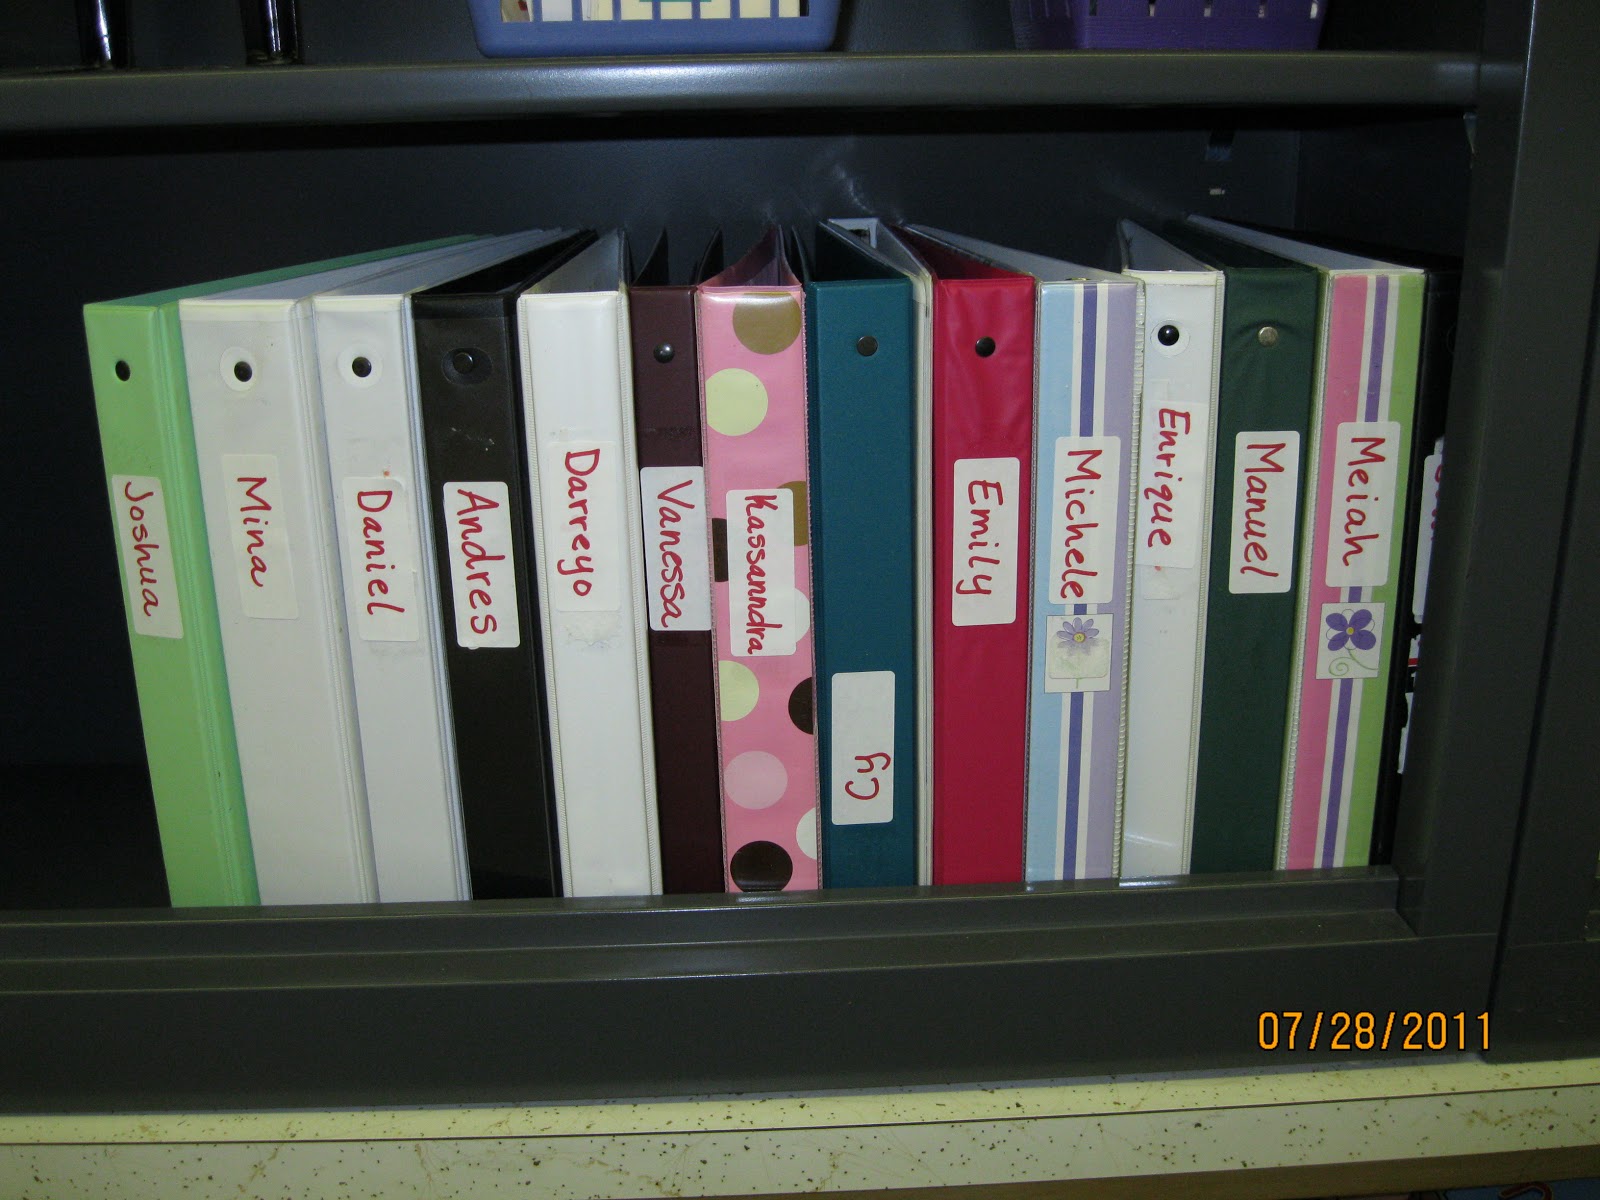
The students keep their poems on a shelf in their Poetry Binders.


I also keep my own Poetry Binder, so I can refer back to it year after year. 


I use those clear plastic page protectors in my binder.  But for the kiddos, I just three-hole punch their papers ahead of time and they simply open up their binders, slip the rings into the paper holes, and then close their binders CAREFULLY!  (Yes, a whole lesson on opening and closing their binders is definitely involved at the beginning of the year.)

Here is our typical routine:

1 - I show the poem on the SmartBoard.  I model how to read the poem, tracking the print with a fun pointer as I read.


Here are some fun pointers we have in our classroom.  I found these treasures in the Dollar Bin at Target.


Most of our pointers are stored in this fun Dora the Explorer (clean) trash can that sits on the floor, right below the SmartBoard.

2 - Usually I will call on a volunteer or two to identify the title of the poem and the poet's name.

3 - The students read the poem.  Okay, right now, you're probably thinking, "Say what!?"  When I say my Kindergarten students read the poem, I mean they echo read each line after me.  To make it fun (the kids love this), we use a pat, clap, pat, clap beat as we read.  Most of our poems go well with that rhythm.

4 - Usually we talk about the poem at this point.  We discuss any unfamiliar vocabulary.  We talk about the message that the poem is sending.  If the poem is meant to be funny, my Kinders don't always "get" the joke, so I'll explain that.

5 - I call on volunteers to find and circle our letter of the week with the BLUE SmartBoard pen.  (We always make sure to circle letters with blue, so when I am checking their papers later, I know that they knew what it was they were circling.)

6 - I call on volunteers to find and circle our high-frequency word of the week with the BLACK SmartBoard pen.  (We always highlight high-frequency words with yellow on our papers, but since we do not have a yellow SmartBoard pen, they circle with black.)

TIP!  If your kiddos are getting antsy at this point, I usually send my students back to their desks after they find and circle the letter or high-frequency word of the week.  I don't know why this works.  I think the kids are proud, like "Look at me.  I did my job, so now I can go back to my desk."

7 - So at this point, I send all the kids back to their desks, if they are not there already, and I pass out one copy of the poem to each student.  I also pass out their markers.  (Yep, I am a meany teacher who does not let her five and six year-olds keep their markers at their desks.  We use them on special occasions...like the Poem of the Week!)  My students know what their jobs are:  1) Circle the letter of the week with blue marker and 2) highlight the high-frequency word of the week with yellow marker.  Most of the time, there will also be a box at the bottom of their paper.  The students know that they should draw an illustration to match the poem.

TIP!  If your school is like mine, white photocopy paper is like gold.  But TRY to photocopy on white paper.  If you use other colors, it makes it hard to see the yellow highlighting and sometimes it can be difficult to see the students' illustrations.


This poem was from super early in the year (July), so we were only circling the letter of the week at this point.


Here the students were circling the letter "Tt," highlighting the high-frequency word "my," and color a picture of their own face in the box.


The students circled the letter "Aa," highlighted any high-frequency words they could find (this was a review week), and then colored apples in the basket.

8 - When I notice he kids are finishing up, we will read the poem together one last time.  Then, they retrieve their binders from the shelf, put their new poem in there, and then put their binders back in their homes.  :)

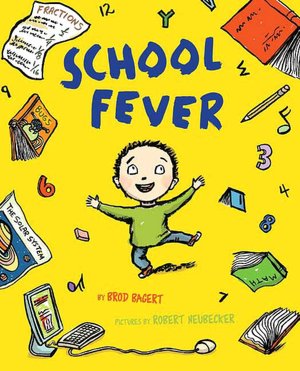
One of my favorite children's poets is Brod Bagert.  If you would like to visit his fun website, click HERE!


He has written several children's poetry books, including my favorites:

"Shout!  Little Poems that Roar!"


"Chicken Socks and Other Contagious Poems"

"Giant Children"


"School Fever"


So that's it! Now if you read through this LONG post, you definitely deserve a FREEBIE!  Please stop by my TPT Store to get your own copies of some of my favorite Brod Bagert poems.  I love these poems!  So fun!  They are ready to print and use in your own classroom.

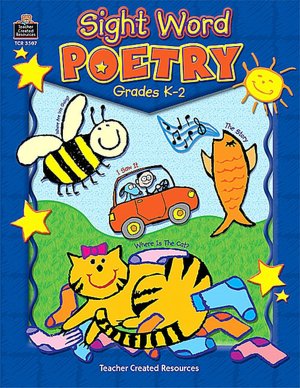
If you are looking for poems that are stuffed with high-frequency words, I recommend getting your hands on this one:


The poems are not as fun as Brod Bagert's, but they get the job done.
Don't forget to leave any comments or tips that will help us improve our Poetry Binder system.  Thanks for stopping by!  :)


Monday, December 12, 2011

Winter Writing Activity: "The Mitten" (FREEBIE!)

Now this might sound like a complaint, but it certainly is not!  I absolutely LOVE my school's year-round schedule.  As a matter of fact, I have been on winter break since December 2nd and we do not return until January 3rd (I know...we are lucky).  However, we hardly have time to do Christmas projects and other fun activities.  So anyway, I focus less on Christmas and more on winter in general when we return in January.

Here is an activity I use with my Kindergarten students:

1 - I read aloud The Mitten by Jan Brett.  (Believe it or not, I picked my copy up last year at Sam's Club for a lesser price than, say, Barnes and Noble.)


2 - The students retold the story.  We used a bed sheet as "the mitten."  Last year, I draped it over some student desks.  This year, I had some student volunteers just hold the sheet.  I gave more student volunteers masks and they became the animals in the story.  You can find these animals masks by clicking HERE!  I suggest saving them to your flashdrive or computer, just in case you lose track of the website in the future.  (By the way...if you have not yet visited Jan Brett's website, spend the time doing so!  She has SO many activities and printables that she shares with us for FREE!  Check this page out - Jan Brett's Activity Page)


Here is an example of one of the masks.  I printed mine on the color printer at school, glued them on cardstock, cut them out, laminated them, and then attached them to these big, wooden paint sticks I had in my classroom.

3 - The students imagined that they were the child in the story.  I told them to be as creative and silly as they wanted.  We brainstormed things that might fit in our mitten and then we wrote our ideas on chart paper.

4 - The students completed an independent writing activity.  You can get this for FREE by visiting my TPT Store.  Just click HERE!  Students fill in the boxes with high-frequency words.  My students decided they could write one of these words in the first box:  "My, The, This" and one of these words in the second box:  "the, a, my, this."  Then, they colored pictures inside of the mitten to match their sentence.

5 - I created a cover and put the pages together to create a classroom book.  My goal is to put a new classroom book out on display in the hallway at least once a month.  So far, I have been successful this year!

Well, that's it!  I hope you are able to use these ideas in your classroom.  My students LOVE acting out the story and crawling into "the mitten."  I bet your kids will have fun, too!  Thanks for stopping by.  :)


Sunday, December 4, 2011

Preparing for the Sub

Holy guacamole!  I have not posted in a LONG time!  I blame it on the fact that I have been busy in my classroom and finishing up my grad work.  On top of that, my husband and I found at that we are having a baby...YAY!  I am now in my second trimester and my little brain has been thinking lately, "How ready am I to have a sub in my classroom?"

Here are a few tips for helping out your sub, whether it is for one day...or one month:

1 - Post Important (But Not Confidential) Information:  No matter how many times my students practice lining up in ABC order for our lunch line, we inevitably face those random arguments about who goes where in the line.  Be sure to post your lunch line order or any special order that the kids need to remember.  Here is a picture of our lunch line order (right), as well as a list of our bus riders (left).  They hang just to the left of our doorway and they are up high, so they do not occupy valuable wall space.


My students know their assigned squares on the carpet.  However, they have a tendency to squirm around and get into the squares of others - which can cause arguments and interruptions.  Help the sub to quickly fix the problem (and move on with the lesson) by posting your carpet seating arrangement.  I used an unused pocket chart and student photos.  This hangs on the wall near our carpet area.


2 - Post Emergency Procedures:  Of course every good teacher leaves directions for Emergency Procedures in her sub folder.  But how useful is that to a sub teacher, when the bell is ringing in her ear.  She does not have time to scramble for that sub folder.  Thanks to my awesome neighbor Kindergarten teacher, we have these Emergency Procedure posters hung above our doorway.  A sub teacher can simply pull them down as she walks out the door.  I also keep a red folder nearby that includes an updated class list and a pencil.


3 - Store Important Items in a "Sub Tub":  I do not have a photo at this time of my "Sub Tub," but it is simply a large, clear plastic tub labeled "Sub Tub."  Here is a short list of suggestions of items you may want to keep in your "Sub Tub."

- Welcome Letter
- DETAILED LESSON PLANS!
- Emergency / Back-Up Lesson Plans and Materials (for those days when you were not planning on being absent)
- Student Name Tags / Necklaces  (Ours our lanyards from Office Max with flat, wooden tags attached to them.  They are technically ornaments that I bought from the clearance rack at JoAnn Fabrics after Christmas last year.  I find they are more durable than plastic name tags.)
- Updated Class List
- Photos of Your Students, labeled with their names
- Candy, Coins for the Vending Machine, or Other Treats  (Show the sub how much you appreciate that they are there!)
- Sub Feedback Form  (Ask the sub to jot down some notes about things that went well and things that did not go so well.  You need to know what you can do to make the next experience even better for future subs.)
- Master Schedule and Specialists Schedule
- Classroom Procedures  (I have mine labeled as, "Everything You Need to Know About Room 105!")
- Teacher (Lunchroom, Recess, Bus, etc.) Duty Schedule

There really is so much more you can do as the homeroom teacher to help out your sub.  I feel like this post has so many holes!  I am going to take more photos in my classroom and update this post later, so be sure to check back!