Home Mrs. Unger's Unbelievable Elementary Experiences! Meet The Teacher Classroom Tour Contact Me Image Map


Wednesday, August 31, 2011

Art Integration, Name Writing, Measurement, Colors and Patterns...All in One!

My summer was pretty awesome overall and one of the (many) reasons I enjoyed it so much was because of this Fine Arts Methods class I took during my grad program.  The instructor was AWESOME and she gave us so many great ideas in regards to incorporating the arts into our general education classrooms.  Anyway, I credit her for the idea I am about to share with you.  :)


The supplies you will need include:
- watercolor paints
- paint brush
- dark crayons (black is probably best)
- white construction paper (the longer type)
- cup of water
- pencil
- ruler (if working with older children)

1 - If you are working with students who know how to measure...they should measure 3 inch by 3 inch squares using a ruler and pencil.  If you are working with younger children, you will have to do this part for them ahead of time.

2 - Using a pencil, the students write the letters of their name (one letter in each box).  They should try to use the entire space within the box.

3 - The students trace over all pencil marks with a dark crayon, such as black.

4 - The students then use the watercolor paints to fill in ALL white spaces.  They need to think this through ahead of time, so they make a pattern.  Notice in the photo, all my "M"s are the same, all my "R"s are the same, etc.

Ta-da!  That's it!  By the way, this art technique is called "Crayon Resist," in case you were wondering.

I taught Arts and Crafts (grades Kindergarten through 5th grade) this summer and we did this project only with the intermediate students.  They LOVED it!  I think Kindergarten students could do this with help (and if you measure the boxes for them ahead of time).  I think I will give it a shot.  Let me know if you try it and how it goes!  Have fun!!


Tuesday, August 30, 2011

Teacher Tipster is BACK for Season 2... Yippee!!

For those of you teachers out there who LOVE Teacher Tipster like I do, you will be thrilled to know that he is back TODAY for Season 2!  Woo hoo!!  (Okay, stopping my happy dance now.)  He will post a new video every Tuesday all year long.  I recommend subscribing to his videos on YouTube.com so you don't miss a thing!  Click on the video below to check out Video #1 of Season #2. 


Great tip, don't you think?!  I have seen bigger lights at The Dollar Tree, but I wish I knew where he got those little guys.  I like that they are magnetic.  Talk about a FUN way to review numbers...or almost anything for that matter!

Sunday, August 28, 2011

Dealing with Difficult Behavior

Fun in First

I am super excited to join the Linky Party that is going on over at Fun in First!  I have a particularly difficult group of kiddos this year, so I have been spending the last month researching and reading tips and tricks to work with them.  (I work at a year-round school, so I had my kids for a month, but then we had a month break... in case you were wondering.)

Anyway, here are some things that I already do OR I might try doing when our school goes back in session:

1 - Behavior Chart:  The majority of primary teachers out there have a behavior chart.  Ours has a pirate-theme.  The kids start on the pirate ship every morning.  If their behavior is less-than-desirable, they start "walking the plank" to "Warning."  Next comes "Time Out" and finally there is "No Recess and Parent Contact."  For the extreme behavior that I just need a break from on those rare occassions, the child goes to our Buddy Room.


If the students do not have to "walk the plank," they receive a treasure at the end of the day.  These treasures are simply colored wooden craft shapes glued to popsicle sticks.  Once the child has earned 5 treasures, he/she is allowed to select a prize from the treasure chest.  Oh what fun!


By the way, if you are interested in having a pirate ship behavior chart of your own, let me know.  I can easily find it on my flashdrive and post it on my TPT Store... no charge of course.  :)

2 - Musical Box:  I read about this idea in one of my grad classes and at the time, it seemed like a "good idea to remember for one day."  Well... that "one day" has arrived because I have a group of TALKERS this year!  So if your kiddos are super talkative, you can simply walk over to your musical box and lift the lid.  The music is a cue to them to be quiet and that it is not a good time for free talk.  Once they are quiet, you can shut the lid.  If the children have music left on their musical box at the end of the week, you can give them a prize.  Think of something that will motivate them:  5 extra minutes of recess, a popcorn party, whatever they like!


(This is my little "Wizard of Oz" music box.)


3 - Sponge Activities:  Be sure the kids always have something to do and they know what their options are.  In my classroom, we call these "sponge activities" because they are educational learning activities or fine-motor activities that "sponge" up the time, when students finish faster than the rest of the class.  Some examples include listening to a story on tape, listening to educational songs on CD, building blocks, linking logs, read to a stuffed animal, read to a puppet, sewing, step-by-step drawing, puzzles, etc.  The picture below shows some of our sponge activities.


The students usually remember what their choices are, but we have a choice board anyway.  When you introduce each activity, be sure to take a photo of a child modeling the activity, then stick the picture on a memo board.


4 - Fidgets:  This is a Cindy Middendorf idea.  I love her, by the way!  You can read more about this awesome lady on my blog.  Anyway, fidgets are small objects that you give the students when they are antsy or fidgeting.  I read about this idea last year, but never felt a need for it... until this year.  I have a kiddo who just cannot seem to keep his hands off of things, including the children around him.  I am hoping this strategy works!  A set a box of fidgets near our carpet area that include pieces of soft fabric, squishy balls from The Dollar Tree, tension balls, objects that can be twisted, etc.

5 - Swimming Rings:  I have two students in my classroom this year who just... cannot... stay... seated.  I know it is early in the year, but I do not have a good feeling about the way things are going now.  If my kiddos want to stand while at their desks, I have no problem with that.  However, it becomes a problem when we are on the carpet, especially when they are bothering other children.  What to do?  What to do!?  I recently read that partly inflated swimming rings help children stay seated.  I love this idea because they are reasonably inexpensive AND they kids can take them to their chairs as well as their carpet seats.  I have to get my hands on a few of these!


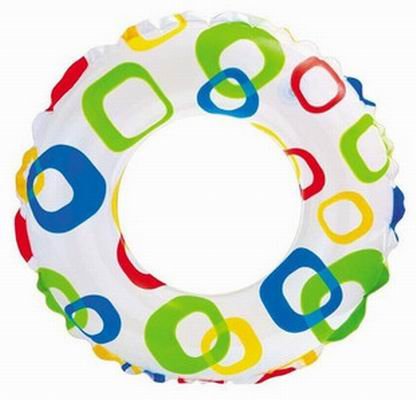
Okay, after I posted about these swimming rings, I went on a serious hunt for them.  The Dollar Tree?  Nope.  Merchandise Outlet?  Nope.  Nelson's Store?  Score!  I found them for only $1.29 a piece.  Crazy that I found the exact one I was looking for, huh!?


Hmmm... I guess I should stop at 5 ideas before I lose your attention.  (Isn't that the rule with Kindergarten students anyway??)  I hope you can use some of these ideas in your own classroom! Thanks for stopping by!


Where is Room 105?

Mrs. Carroll is an AWESOME blogger at The First Grade Parade.  She recently posted a few Friday Freebies that are all great, but my favorite is her "Sorry We Missed You" clip chart.


Isn't it awesome!?  Thank you, Mrs. Carroll, for sharing!  Unfortunately for me, my kiddos do not go to a Counselor and our Book Buddies (a.k.a. Buddy Readers) come to us.  So... I created my own clip chart that is more appropriate for our class.  You can download it for FREE at my "Teachers Pay Teachers" website by clicking HERE!  It is not as cute as Mrs. Carroll's, but if it works for you and your class... feel free to use it!

Thanks for stopping by!


Stretchy the Word Snake!


When I saw Kelly's "Stretchy the Word Snake" photos on her blog From Kindergarten with Love, I just knew I had to have this activity in my own classroom!  Click HERE to see her photos and read about the idea.  She was so kind to share her cards (visit her blog for the FREEBIE), but I could not find the labels.  No worries though, I have created my own that I am sharing with you!  Visit my "Teachers Pay Teachers" store to get the documents for FREE!

The Stretchy the Snake labels can be printed on Avery 5163 labels.  I recommend printing them on a color printer, if you have one available to you.  You then stick the labels on a plastic pencil holder, such as the ones below.  I purchased mine at a local store called Merchandise Outlet for 89 cents but I have read about other teachers finding them at Target for only 69 cents!
 Then you cut out the cards.  So far I have made cards for the Short A sound, but I hope to make more soon.  Click HERE to go to my TPT Store to get the Short A cards that I made for FREE!

You can also find the Short I cards HERE!

Mrs. Williamson extends the Stretchy the Word Snake idea in her classroom.  Visit her blog called Welcome to Room 36 for more fun ideas!  I think Deanna Jump might be the original genius behind the Stretchy the Word snake, but I am not sure.  Visit her AWESOME blog, Mrs. Jump's Class to learn about how she incorporates the snake in her classroom.

Thanks for stopping by!  I hope you are able to use this activity in your own classroom.  :)


Love, Love, LOVE these personalized clipboards!

There are many creative people out there who make personalized clipboards, but my favorite is Slim-Digm Designs on Etsy.  She is great to work with and her clipboards are AWESOME!  I ordered myself one...I couldn't resist.  My students just love the ribbons on the clip part!


I also ordered one of my colleagues a personalized clipboard as a "thank you" gift, but I do not see the photo in her shop anymore.  Aren't they just the cutest!?  Head on over to her shop to get your own!


I Spy Readers FREEBIE!

Mrs. Bell over at A Place Called Kindergarten really had her thinking cap on when she thought of this idea!  We all know how important it is to get students excited about reading before we teach them to read.  It is a critical engagement strategy if we want our students to become successful and motivated readers.  Well, Mrs. Bell and her class made "I Spy Readers" magnifying glasses and then walked around their school to look for readers.  Best of all, Mrs. Bell shares her magnifying glass pattern.  Click HERE to get her freebie!  

I plan to use this idea in my own classroom after a read aloud.  I am thinking we might read a book from one of my favorite authors, Todd Parr.  It's called Reading Makes You Feel Good.


Another book popped into my mind that might work well for this activity.  It is a Reading Rainbow book called Read Anything Good Lately?


Thank you to Mrs. Bell for sharing her neat idea!


Thursday, August 25, 2011

Back-to-School Shopping! Woo hoo!

I just received an e-mail from the clothing store, New York and Company, and it explained that teachers can receive 30% off their purchases now through August 31st.  Can we say back-to-school shopping!?  Just remember to bring along your current school ID so they know you're the real thing.  ;)  By the way, New York and Company normally offers teachers 15% year-round.

New York and Company Teacher Sale

White House Black Market is offering a similar teacher discount...this one is 15% off though.  Better than nothing, right!?  Their sale lasts a little longer...now through Tuesday, September 6th.

You treat your students all year long.  Now treat yourselves!  Happy Back-to-School Shopping!

Back-to-School Giveaway from Mrs. Parker!

Mrs. Parker at Learning with Mrs. Parker is having a Back-to-School Giveaway.  How exciting!  Now there are a lot of giveaways out there (because fortunately our world is filled with caring, giving teachers).  However, this one in particular is especially GREAT!  Mrs. Parker is giving away a CD called "Get Up" by Mark D. Pencil.  I had never heard of him, but I am excited to have just learned!  This CD is yet another way to incorporate music and movement into your school day, which is obviously oh-so-important, especially with the little ones.  Oh, I almost forgot!  She is also giving away a $15.00 i-Tunes gift card, so you can buy the previous CD as well.  Anway, head on over to her blog (click on the link above) to enter.  Have fun and thank you Mrs. Parker!


Learning with Mrs Parker


Tuesday, August 23, 2011

I Need to Stop Climbing The Dollar Tree!

I will admit...I am a Dollar Tree junky!  All the colorful products and great deals...do you blame me!?  I absolutely love hearing an idea or reading about an idea and then stopping in the Dollar Tree the very next day and finding exactly what I need to make that idea come alive.  I stopped in there today for ONE thing - really - Dixie cups.  Believe it or not, the Dollar Tree did not have them.  However, I did find a few other items of interest.  :)


I love the colors of these bins!  I do not have a particular idea in regards to how I will use them in the classroom, but a teacher can never have enough bins, box, crates, etc.  So I picked them up!


The Dollar Tree carried some similar Bath Puppets last year (which I picked up, of course), but these guys are WAY cuter, more colorful, and more fun!  A teacher can do any number of things with these Bath Puppets, but I especially like to use them when I am teaching my kiddos about syllables in a word as well as words in a sentence.  Ask the students to clap the syllables in a word and you'll have 75% of them participating...if you're lucky.  Now offer them a Bath Puppet and you'll surely have 100% of your kiddos clapping those syllables!  BONUS...the puppets help to minimize any loud clapping, which is beneficial if other students are working on different activities.


Last year I picked up a Clifford Color and Sing CD - yes, for only $1.00.  Awesomeness!  Well, anyway, I found 3 more NEW CDs:  "Friendly Songs," "Silly Songs," and "Happy Songs."  There are 20 songs on each CD and apparently you can download coloring sheets, too, which I have not tried.


I ended up finding my Dixie cups next door at Pick 'n Save.  I will be using them to make Power Towers.  If you don't already know what Power Towers are, you just have to visit Teacher Tipster and he will explain.  Mrs. Gilchrist also created some AWESOME labels for the Power Tower cans and she was kind enough to share them with us for FREE!


Sunday, August 21, 2011

Mrs. Unger...is that REAL?!?

This past winter, my dear husband dragged himself to the Scholastic Warehouse Book Fair in Milwaukee with me - have I ever mentioned how sweet my husband is?  ;)  Anyway, it was my/our first time there and it was AWESOME!  (Well, I thought it was a great time...not so sure about my hubby.)  Books, books, and more books at pretty inexpensive prices.  Believe it or not though, my favorite purchase that day was not a book.  It was a cash register that I bought for $5.00!!  The Scholastic people had just updated their system, so they were selling all of their old cash registers...and believe me, there were plenty to choose from.  I knew I had to have one, especially for that price!


Pretty neat, huh?!  Originally I thought I would only break this bad boy out after my students learned about money, but then I thought, that's silly!  So I stuck it in our housekeeping area.  The kiddos LOVE it!  They always ask, "Mrs. Unger...is that REAL!?"  Haha, yes, it is.  And then the next question usually is:  "Do WE get to use it?"  You betcha!

Who knows if Scholastic is still selling these guys, but I have to imagine you might be able to find one with some creative searching...perhaps Goodwill?  Good luck on your hunt!  :)


Friday, August 19, 2011

A simple idea that helps minimize chaos in the Kinder classroom!

No doubt I am not the only teacher across America to use this idea, BUT I think it's worth sharing.  During my second year of teaching, I walked into my colleague's classroom and she was picking up these little red buckets.  I asked her what those were for and she explained that they were mini garbage cans.  How brilliant!  So I went to the Dollar Tree and picked up these little guys - 6 of them, one for each group of tables.


Now I don't want to paint a picture that makes me look like I am the type of teacher who makes her kids sit in their desks all day, every day.  That is certainly NOT the case.  However, some of my little ones just don't understand the concept of cutting out ALL the pieces and then walking to the garbage can when they are done.  Instead, they cut a piece, go throw it away, cut a piece go throw it away...you get the picture.  These garbage cans help that problem!  The kids can keep their desks free and clear of paper scraps as they cut and Mrs. Unger can keep her sanity.  :)


Wednesday, August 17, 2011

More on Math Tubs and Stations...FREEBIES included!

So I recently read that we bloggers should only post once a day, as it is supposedly proper blogging etiquette.  Is this true?  Oh well...this one is worth sharing, even if I post twice in one night. 

I am oh-so grateful for Mrs. Parker at Learning with Mrs. Parker right now!  I was searching the world wide web for hours (no joke) for some labels to stick on my Math Tubs, Math Cards for my management chart, etc.  (Yes - I could have made them on my own, but everyone else seems to do a better, cuter job than me.)  Anyway, Mrs. Parker had exactly what I was looking for and she is sharing them for FREE!  Thank you, Mrs. Parker!!  I am now regaining my sanity, thanks to you.  :)

By the way, the post in which the labels are embedded is totally worth reading!!  (That reminds me...I still have not purchased Debbie Diller's new Math Stations book.  Ugh...never enough time in the day.)

P.S. - I just taught myself how to make a name logo.  I am pretty excited right now!


Learning with Mrs Parker

Math Tubs

I am pretty sure this awesome teacher was reading my mind!  Check out the Math Tubs post at The First Grade Parade.  Totally awesome!  Take the time to read this one...you'll be glad you did.  :)

I had been contemplating how I wanted to do my Math Centers this year.  During my first year of teaching, Math Centers were almost non-existent...sad but true.  During my second year, I tried a system in which there were different stations that all correlated with the current topic.  I quickly found this was overwhelming!  I was constantly creating (and teaching) new activities.  It was extremely difficult to manage this type of system.

As they say, third time is a charm!  I am determined to "do it right" this year!  I will be using a Math Tubs approach to my Math Centers this year, much like she described in her blog (see above).

If you have any tips for using Math Tubs in your classroom, I am all ears!  :)

Wednesday, August 10, 2011

Elmer the Elephant

I don't know about you, but I LOVE Elmer by David McKee and I especially love the message that the book sends to children - it is GREAT to be unique and special!


I also purchased an Elmer the Elephant stuffed animal at Barnes and Noble.  Check him out in the basket below (left side).


So I took a Fine Arts Methods course this summer (a required class for my grad program) and it turned out to be my favorite class in the entire program!  The instructor was amazing and so inspiring.  She filled our teacher buckets with one great idea after another.  I want to share one of her ideas with you.

Start the lesson off by reading Elmer.  This story is especially great at the beginning of the year when you are building community and also when you are learning / reviewing colors.  After the read aloud, lead a discussion about how Elmer was different than all the other elephants and how he felt about that in the beginning of the story and again at the end of the story.  Relate that idea to the students themselves.

Okay, now here is the FUN part!  You are going to use an art technique called "Crayon Resist."  Here are the steps:


1 - Using a pencil, draw shapes, lines, designs...whatever your artistic heart desires!
2 - Trace over the pencil marks with a dark crayon, such as black.
3 - Fill in ALL the white space using various water color paints.
4 - Allow the paper to dry - though this happens quickly if the kids do not use too much water.
5 - Trace the outline of an elephant on the back.
6 - Cut your elephant out and SAVE the piece between the legs, since it becomes the elephant's ear.
7 - Fold the straight edge of that piece about a 1/2 inch or so and then apply glue.
8 - Stick that piece to the elephants head and you are done!

Check out these elephants that my Kinders made this year!


They did not exactly fill in all the white space, but they did a pretty good job, I think!  I suggest you make an example or two ahead of time to show them.  Have fun and let me know how it goes!

I Heart Jo-Ann Fabrics!

I have no idea if Jo-Ann Fabrics is a regional store, but hopefully you are lucky enough to have one in your area. I stopped in there recently (as I often do) and found the cutest stuff on sale...50% off their already reasonable prices! On top of that, I received my normal 15% off Educator's Discount. (If you do not already have your discount card, make sure you sign up for one. You just have to fill out a form and..voila! The savings await you!) Take a look!


The school bus is actually a photo album (as are the front two items).  I plan to print pictures of the students and display them in these photo albums for Parent / Teacher Conferences and family-school events.  The other two items are pencil cups, but as you saavy teachers know, they can be used for so much more!  Jo-Ann Fabrics has so much to look through.  I would have spent a lot more if I was not in a hurry that day.  :)

New Blog Alert!

Okay, so maybe she is not new to you, but I just discovered Katie and her Little Warriors blog.  Her stuff is so darn CUTE!  Check out her FREEBIES that she recently posted for your Orientation, Back-to-School, Meet the Teacher, Open House, Meet and Greet...or whatever your school calls it!  Thanks Katie!  :)

Sunday, August 7, 2011

Class Pets!

In an effort to make my classroom more inviting and "come alive," I made some additions last year...and the kids LOVE them!


In case the photos are not very clear, inside of that little ecosystem are two frogs.  I think they are just the PERFECT class pets because:

1 - They are entertaining for the kids.  They jump and swim and are very active!
2 - I only need to clean their ecosystem 3 to 4 times a year, since it should not be disturbed more than that.
3 - We only feed them 4 pellets of food twice a week.  We do this on Mondays and Fridays.  I have two kids who are assigned the "Frog Feeder" job that week and they just LOVE feeding the frogs!
4 - The start up cost was about $30.  So inexpensive, I think.
5 - I bought a year's worth of food for only $3.50.
6 - The frogs are supposed to live 3 to 5 years, if I remember correctly.
7 - The ecosystem is covered so the kiddos cannot reach in and try to touch them.

I bought these frogs at a teacher store near my condo called The Learning Shop, but I bet you can find these little guys at a pet store.  You could also do beta fish, but my college experiences showed me that those little buggers do not last long.  :(

Another nice addition to your classroom (if you do not already have one) is a plant or two.  I have had a spider plant in my classroom for at least two years.  If I can keep that alive, you can, too!  (I have no green thumb whatsoever.)  The lady at the garden store also recommended a cactus for my classroom and that has been going strong as well.  I tried some pretty plant with flowers on it (I think they are called Impatience) and that died quickly.  From time to time, especially for the beginning of the year, Open House, and Parent/Teacher Conferences, I will buy a big beautiful bouquet of flowers.  The kiddos also love the "Gardener" job.

How do you make your classroom come alive?