Home Mrs. Unger's Unbelievable Elementary Experiences! Meet The Teacher Classroom Tour Contact Me Image Map


Sunday, January 29, 2012

M&M Math and a FREEBIE!


I am pretty pumped for our Math lesson tomorrow!  My students will be reviewing some skills that they have previously learned throughout the year:  estimating, counting, and sorting.  They will also be practicing a new skill:  adding.

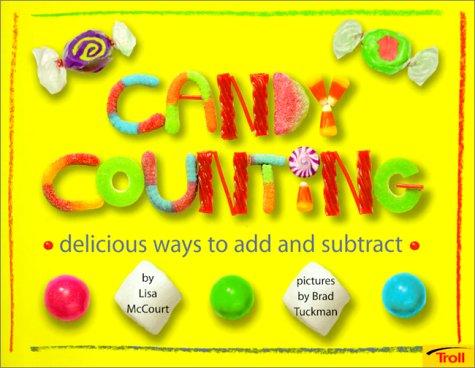
1 - First we will read aloud Candy Counting: Delicious Ways to Add and Subtract by Lisa McCourt.  This book is perfect for our "Stories About Joining" lesson because it tells story problems about candy.  I am fortunate to have this book in our school library.  Check out your own library, but if it is not there, I see that it is on Amazon for a reasonable price.  We will be using real candy as manipulatives to solve the addition problems - whole group - as we read (I am currently skipping over the subtraction problems).


2 - Then the students will be completing the M&M activity sheet that I just made.  If you would like your own copy of this FREEBIE, click HERE to visit my Teachers Pay Teachers store.


The students first estimate how many candies are in their bags and write their prediciton.  Then, they open the bags, count the candies, and then write the answer.  Next, the students sort the candies by color, count how many are in each group, and write those numbers.  Finally, the kids solve addition problems according to how many are in each color group.

3 - Early finishers (you know you will have them) can complete a "Candy Counting" worksheet (by TLS Books) that I found online.  Click HERE to grab yourself a copy.

If you have any fun and hands-on addition activities to share, I would love to hear them!  Do you have any posts on your own blog about addition in Kindergarten.  Please let me know and I will be sure to hop over and check it out!

Thanks for stopping by!  :)


Tuesday, January 24, 2012

Stretchy the Word Snake - Part 2 (FREEBIE!)

Back in August, I posted about "Stretchy the Word Snake," where I saw the idea, etc.  To read the original post, click HERE.  I created short A and short I vowel cards for the activity (available in my TPT store).  I mentioned in the post that I would (eventually) make short O cards, too.  Well...5 months later, I finally did it!

Visit my Teachers Pay Teachers store to grab this FREEBIE for yourself!  Just click HERE!  (There are 5 pages of cards in total.)


Next up... short E and short U vowel cards.  Hopefully it will not take me 5 months this time!

Thanks for stopping by.  :)

Sunday, January 15, 2012

Writing Lesson: The Queen of Questions

Let's face it:  Writing can be boring.  However, it can also be really fun if a teacher plans engaging and authentic activities.  I am happy to say my Kinders had a blast learning about "Questions" and "Interview Questions" the last two weeks.  Here are a few things we did:

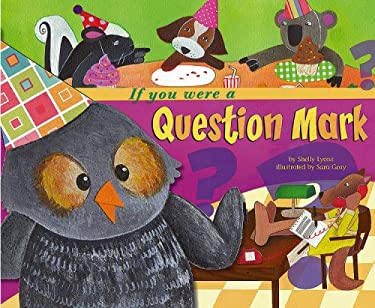
1 - We read aloud If You Were a Question Mark by Shelly Lyons.  I like this book because it describes the uses of and purposes for a question mark in a simple way.  It is informative and it provides lots of examples of question sentences.  (The book also tells a really cute mystery story about a missing cake... my kids loved looking for clues and trying to figure out the mystery.)


2 - I was concerned that the students would not be able to tell the difference between the information and the examples of questions.  In order to differentiate between the two, I figured I would have a puppet "read" the questions.  And then an idea popped in my head... why not put a crown on a puppet and dub her "The Queen of Questions."


3 - Have you ever heard of that game "20 Questions"?  Well, I had 14 kids present the day we did this activity, so we called it "14 Questions," though we normally have 20 children.  Anyway, I put a mystery object in a box that I decorated with question marks (I should have taken a photo, but it was nothing special).  I gave all the kids a Post-It note with a question mark on it.  When each child was ready, s/he raised their hand and asked a question in order to figure out what the mystery object was.  I (or our educational assistant) then wrote the child's question on chart paper and that child came to the front to add their question mark Post-It note to the end of the sentence.  In the end, we re-read our questions and then I revealed the mystery object.


Tip!  I highly recommend using the Post-It notes.  It had a few advantages:  1) I could ensure that each child participated and they felt accountable for coming up with a question and 2) it gave each student an opportunity to show me s/he knew the appropriate spot for a question mark.

4 - During another writing lesson, we focused specifically on "Interview Questions."  Of course, I could have taken the easy route and described what an interview is to my students.  But that is boring and ineffective.  So... my students conducted their own interviews.  We used this FREEBIE from Kindergarten Crayons.  If you would like to get your hands on this awesome printable, visit Fran's amazing blog by clicking HERE!


After my kiddos thought of and wrote their interview question ("Do you like _____?"), I lined up two rows of chairs facing each other.  I gave the kids clipboards and they took their seats in the rows.  The process was like speed dating, LOL!  Student A asked Student B his/her question and recorded the answer in the appropriate column.  Student B then asked Student A his/her question and recorded the anwers.  When I noticed that the students were finished I rang a bell and ONE row (always the same row) of students shifted down one chair.  It worked really well!  Interviews in Kindergarten... easy, peezey, lemon squeezey!


I would love to hear how you teach "Questions" in your class!  (By the way...we will be learning about "Exclamations" this coming week, so if you have any fun ideas to share in that area, I would be so happy to hear those activities, too!)

Thanks for stopping by!  :)


Saturday, January 14, 2012

Easy and Effective MLK Activity!


I love this little story!  It teaches children about appreciating diversity in a Kinder-friendly way.  I do not actually have the book yet (it is on my long book wish list), but a simple Google search will bring up the poem.  Here it is:

While walking in a toy store the day before today,
I overheard a crayon box with many things to say.

"I don't like red!" said yellow and green said, "Nor do I!"
"And no one here likes orange, but no one knows quite why."

"We are a box of crayons that really doesn't get along,"
said blue to all the others, "something here is wrong!"
Well, I bought that box of crayons and took it home with me
And laid out all the crayons, so the crayons could all see.

They watched me as I colored with red and blue and green
And black and white and orange and every color in between.

They watched as green became the grass

And blue became the sky.
The yellow sun was shining bright on white clouds drifting by.


Colors changing as they touched, becoming something new.
They watched me as I colored.  They watched until I was through.

And when I'd finally finished, I began to walk away.
And as I did, the crayon box had something more to say...
"I do like red!" said yellow and green said, "So do I!"
"And blue, you are terrific so high up in the sky."

"We are a box of crayons, each of us unique,
But when we get together, the picture is complete."


1 - So first I read the poem to my students and then we discussed its message.  We related those ideas to what we have been learning about Dr. Martin Luther King, Jr.

2 - Then, my students colored a self-potrait on a crayon pattern.  We used the crayon pattern found at KinderArt.  Click HERE to get your own copy!  My kiddos then cut out the crayon pattern.

3 - Finally, we put all the "crayons" into the "crayon box" that our WONDERFUL educational assistant created.  I know I have mentioned this in past posts...but she really is SO much more creative and artistic than I am.  Here is what she made:


Here is the finished project with the crayons:

 
I just found this really great post from First Grade to the Core that describes how another teacher uses this book / poem in her classroom.  Be sure to stop by because she shares TWO FREEBIES that you can use in order to make a classroom book that goes along with "The Crayon Box That Talked."

I would love to hear about how you use this book in your own classroom.  If you have ideas or comments, please do share them!  Thanks for stopping by!  :)


Thursday, January 12, 2012

Winter Fun - You should try these ideas!

Oh... my... goodness!  We have had so much fun in class this week!  Here is what we have been up to:


How cute are these!?  I thought of this activity based on two Pinterest inspired ideas:


AND

Mrs. Lee's snowman project


So here is what my kiddos did:

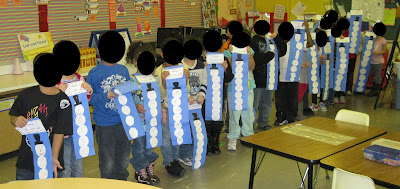
1 - First, the kids counted how many letters are in their first names and cut out that number of white circles (I gave them cardstock tracers / stencils and the kids did their own tracing and cutting).  They wrote one letter of their names on each circle.  Then, the kids glued the circles on top of each other (on a blue strip of construction paper) in order to spell out their names.

2 - Next, the kids glued on a top hat (my assistant cut these out of black construction paper ahead of time) and colored stick arms and a face.

3 - Then, my kids measured the height of their snowmen using snap cubes.  The students wrote the answer on the label in order to complete the sentence frame:  "My snowman is ___ cubes tall!"  They glue these labels at the top of the blue strip of paper.

4 - Finally, my students worked together to compare the heights of their snowmen and put themselves in order from shortest to tallest.

Here is a close-up of a completed project:


This was an awesome and fun way to introduce the concept of Addition!


The project above was also a Pinterest inspired idea:

Pinned Image

These adorable hot chocolate mugs originally came from Mrs. Wood.

A few weeks ago, I remember reading a post in which the children compared their own heights to the height of a giant gingerbread man.  Unfortunately, I cannot remember whose blog that was.  Anyway...I put a winter twist on that idea - My students compared their heights to that of a giant snowman!


I cannot take any credit for this cutey.  Our wonderful educational assistant is the creative mind in our classroom.  She whipped up this fun snowman in less time than my students were in gym class!

After the students compared their own heights to the snowman, they graphed the results using Post-It notes:


We opened up the lesson with yet another Pinterest-inspired idea:


This idea originally came from Under the Big Top.  I put a winter twist on it by having the kids predict the height of and measure a snowman instead:


Before


After

I so love teaching Kindergarten!  Thank you to all of you wonderful teacher bloggers out there who share your ideas!!  You make my job even more fun.

Thanks for stopping by.  :)


Monday, January 9, 2012

My Favorite MLK, Jr. Book!

If you can get your hands on this big book, grab it and do not let go!


"The March" written by Jane Ann Thomas and illustrated by Gary Gianni

It is random LUCK that I own this book.  My father-in-law (a retired Nystrom employee) had all these left-over classroom materials in his garage.  Since he was no longer selling, he game most of them to me!  This awesome book was included.

I will be honest...I was hesitant at first to read it to my Kinders because it is a bit long.  But after two years, I have learned that this book has a HUGE impact on their understanding of Martin Luther King, Jr. and the Civil Rights Movement.  The story is told from the perspective of the two little girls (on the front cover), so the students relate to their point-of-view.  Even my most talkative students sit quietly and wide-eyed, listen attentively, and ask appropriate questions throughout the book.

What MLK books do you use in your classroom?  I would love to hear about other good ones out there.  Thanks for stopping by!  :)


Sunday, January 8, 2012

Measurement Fun and a FREEBIE!

Thanks to so many AMAZING teachers and bloggers out there who shared their "Measurement" ideas, I was actually excited and motivated to go back to work last week, haha!  Here are some activities my kiddos completed in order to enhance their understanding of "Measurement."


This was a Pinterest-inspired idea.  (That's my hand!)  After I made a few clicks of the mouse, I realized this idea came from Mrs. Larremore at Chalk Talk.  If you want to check out her awesome post about "Measurement," click HERE!

We read the book "Actual Size" by Steve Jenkins.  The kids loved this book because it shows the actual sizes of some animals' body parts.  They got a kick out of comparing the sizes of their own body parts to the book.  (This was an introductary lesson, by the way, to get my kiddos to see and compare various sizes of things.)


Other than getting your hands on the book, you will need paint, paper plates, construction paper, and a sink to wash the students' hands!


Aren't they so cute!?  In the end, I asked the students, "So whose hand was bigger?  Yours?  Or the gorilla's hand?"  Thank goodness they responded with an unanimous "The gorilla's hand!"


This next idea came from The Mailbox.  I subscribe to their daily tips and ideas via e-mail (it is easy to sign up for those, if you're interested).  I also found this same idea on the Oriental Trading website.


So the kids make these adorable snowman sticks in order to measure the snow.  I went to our local hardware / paint store and they donated 20 paint stir sticks to my classroom.  YAY! 


I purchased some white spray paint and my hubby was sweet enough to paint them for me.  By the way, this one can was enough to do 2 coats on one side.  I highly recommend painting on the side that does not have writing on it, otherwise you'll need more paint.


All my kiddos had to do was add the hat, scarf, eyes, nose, and mouth...and they were done!


You'll notice I decided to leave off the stick arms.  I fear they will break off anyway when it is time to measure.  I also left off the numbers.  Since my Kinders learn non-standard measurement, I did not see the point in adding inches.  We are going to just mark numbers, like "1" for first snowfall, "2" for second snowfall, etc.  In the end, we can compare the snowfalls just as easily that way.


Now we wait for the snow!


Update:  We were able to measure the snow on Friday... yay!  The kids loved it!


My kiddos also measured with big and small marshmallows.  Oh...my...goodness!  They loved this activity!  After we were done, we went down to the teachers' lounge and drank hot cocoa with marshmallows.  :)


The recording sheets that we used came from two great teacher bloggers who love to share.  Click on their blog names to visit their blogs and grab these freebies!  The first one was from Lauren Blackmon at The Weekly Hive.  The second one was from Kelli Bollman at Castles and Crayons.  These are both awesome blogs, so take time to explore!

So for this coming week, I have more fun activities planned!  We will learn about measuring and comparing by height, which leads me to your FREEBIE!  My students are going to use snowflakes (I bought some nice ones at a local teacher store, but you could just as easily make some) to measure their heights and then compare their own height with others by using this recording sheet.  Visit my TPT store by clicking HERE to grab the recording sheet.


Update:  Here is a photo of the snowflakes we used to measure our height.  I actually do NOT recommend using snowflakes this big because so many of the kids had the same numbers.  If you use smaller snowflakes, your class with have a wider variety of data / numbers to work with when they are comparing with friends.  I hope that makes sense.


I hope to post again next weekend about the "Measurement" activities we are going to do this week, so check back later!  Thanks for stopping by!  :)